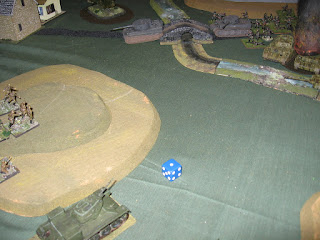
Thursday, January 17, 2013

Battalion Advance

Normandy, 1944. The allied advance has stalled.

Divisional HQ has decided on probing attacks to uncover weaknesses in the enemy defences while capturing important local objectives. Two infantry battalions, with limited support, are to conduct the attacks. The third battalion of the brigade remains in reserve and is not available for today's operation.

So says the introduction to Keith McNelly's 'Battalion Advance' scenario. Nick and I had a shortened afternoon available to play a 20mm Spearhead game, and this looked like a good sized game to tackle. The scenario is set up to be played on a 4'x3' table with normal SH scale, so we expanded it onto a 6'x4' table using the 1.5 x ground scale. Nick took the British attackers, and I took the German defenders. This is a brief account of the action. The photos are generally taken with a view from behind the German lines.

The British attack came from the top of the photo. Nick opted to focus on his left flank (advancing along the right side of the photo, attacking the German right flank), the first battalion advancing on foot. The second, with armour attached, sat off table in reserve per the scenario option.


The Germans were entrenched.


The advance under way, with Nick having decided to commit his reserve early, seen here entering the table behind the first battalion, complete with armour. He concentrated his entire attack on his left, the German right.


First contact, the British advance comes under mortar fire.


I opted to keep the two StuGIIIs as my two hidden stands. The first was revealed, in its hull down position in the centre of the ridge line that defines the battlefield,  as the British armour crossed its front. The first Sherman was brewed up from a long range shot.


With the focus of the British thrust now apparent, the German left wing German defending platoons advanced across towards their right, hoping to catch the British attackers in flank and rear.


Action is joined between the German right flank defenders, well dug in on the edge of the woods, and the British attackers swinging wide around their flank.


The one sided armoured duel was short lived, but the lone StuG took out the Firefly before the British armour passed from view behind the terrain.


The perilous position on the German right is apparent here when the strength of the British thrust around the German right flank is seen.


And so they continued to sweep around the flank towards the town sector.


With the flank attack capturing the town, the first of the two British armoured platoons moves on past the town, to discover not only the first StuG platoon that had engaged them from long range, but also the second StuG platoon. Oh!!!!


The Sherman platoon is suppressed ..


British infantry close assault some of the German defenders, but are repulsed.


We ran out of time after nine turns, and Nick conceded the game, as casualties had mounted to 11 stands, with only two of the 4 necessary objectives in his hands.

So what was the verdict? This is a scenario I've looked at several times, and perhaps dismissed as a little too small.

Well fool, me! This is an excellent scenario, challenging to both sides. Nick's plan was a good one. His only downfall was in the use of his artillery. He tried to shell the German defenders out of their entrenchments, too hard an ask for the small 25pdrs. More judicious use of smoke might have allowed for his well executed sweeping flank attack to get behind the German positions with far fewer casualties. Had he done so, he still had plenty of moves in hand to capture his objectives and win the game.

Again here is Nick's AAR.


Sunday, January 13, 2013

Taking the pressure

It is August 1943, and the battle for Kursk has been abandoned. German forces have been falling back for days now, and the Russian counter offensive must be stopped. The local German Corps commander sees the opportunity to cross the Katurin river and take the attackers in the flank, but to do this he must capture at least one bridge across the river to allow wheeled transport and artillery to follow up and maintain support for the counter attack. The area he chooses for the counter attack has two possible bridge crossings available, and his view of the battlefield he has chosen, looking north, can be seen below.


The two bridge crossings across the Katurin River, seen from the south looking north. The German counter attack goes in form the right
The Commander decides to send a battalion forward to take the town on the left of his axis of advance to hold that flank. His main axis of advance is nor west towards the bridge on the upper right of the photo.


The German blocking battalion is at the bottom of the photo, while the main assault, and infantry battalion supported by a platoon of Tiger 1s, and an under strength battalion of PzKw IVs, is heading nor west towards its objective.

The Russian commander of the 21st Tank Corps has intelligence indicating the likelihood of this counter thrust. He sends a battalion of motorised infantry supported by a small battalion of Su 76 SP guns to take and hold his own right flank.


His main force (a tank heavy Tank Battalion, with motorised infantry cross attached) is sent forward in his centre to act as a central reserve, able to swing towards whichever bridge the German counter thrust is intended to take).

The Russian armour is still equipped with a mixture of T34 76Bs and Cs, and its recon is still undertaken by some of the few BT7s remaining in service.. needs must!!


The Russian right flank defense

Seeing at last the direction of the main German counter thrust, the Russian commander can't believe his eyes as he watches the German forces crossing his flank.

The Russian central reserve is committed onto the ridge line to enfilade the advancing German forces.


The German armour deploys to meet the thrust into its flank
The flank fire proves too much.


Within minutes half of the German armoured battalion vehicles lay smoking.
The German commander pushed on, using his Tiger battalion to spearhead the thrust across the bridge, supporting the infantry battalion.


 ... while the Russian right managed an order change and edged forward to contact the defensive German left and pin these troops in place.


The German PzkwIV battalion failed its morale check and headed away from the action.


Th advancing Tigers were caught in the flank by the Russian armour.


One Tiger platoon destroyed, and the other suppressed.. not looking good for the Germans.
Finally, with all of the German armour either destroyed, or falling back, the battlefield looked like an armoured grave yard.


At this stage the German commander ordered a withdrawal, and his infantry resumed their withdrawal in the face of the overwhelming Russian counter attack.

The game was played using 20mm equipment, and the Spearhead rules. The forces were roughly shaped using the Scenario Generation  System, with approximately 420 points per side. Stan commanded the Russians, and Nick the Germans. Andy and I were subordinate commanders.

The story line for this AAR revolves around the bridge, but  the game was actually objective based, with 5 objectives determined using the SGS. At the end of the game the Russian forces held 3 and contested another. One was not held by either side.

Nick's report on the battle can be found here.

Return to the Renaisance with DBR

I've always loved renaissance wargaming, and have two armies suitably configured/based for the DBR rules: Royalist (ECW), and Ottoman. T...