The BEF advanced across northern France and into southern Belgium. The invaders must be stopped at all costs. But the advance has not come cheaply, with mechanical breakdowns and relentless Luftwaffe attack taking their toll. Colonel Gorman's battalion has lost equipment along the way, as has the 5th RTR. Despite these difficulties he must hold the river crossing in the face of the Wehrmacht juggernaut.
This game was the first outing for the still nascent 1940 France British and German forces, modelled in 20mm. Many of the vehicles, and the British infantry, all came courtesy of good friend Gerard Davey. The game was fought using a variant of the Rapid Fire rules, the variant prepared by Adrian Powell. This is not my preferred rules set, but provides a fun game all the same.
The battle field seen from the British right flank. The vital bridge crossing can be seen in the middle foreground.
Colonel Gorman's battalion was forced to deploy off the march, with troops barely reaching the bridge before German troops could be seen in the distance, no time to dig anything but the shallowest of shell scrapes. Troops rushed to the bridge, taking one of the battalion's remaining 2pdr AT guns with them.
One German infantry battalion advanced against the bridge with heavy PzkwIV support.
The main German armour was deployed in the German centre, light recce PzkwIIs and I in advance of the main fighting battalion of Pzkw IIIs.
The British Divisional cavalry (Vickers MkVIs) pushed cross towards the flank of the main German thrust through the centre. The A13 Cruisers were deployed on the far left of the British deployment zone.
 |
| German infantry moves up through what the Germans see as a large hole in the British centre |
 |
| The German right flank looking towards the British left. Col Gorman has anchored his left flank in a small Belgian town. |
 |
| The Div Cav comes under fire from the German PzkwIIIs, their A13 support seen about to come over the crest of a large rise in the background. |
 |
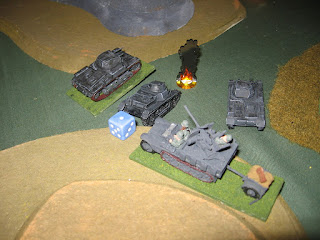
| The main German armoured thrust, the lighter recce tanks seen in the foreground probing around the flank of the British position |
 |
| Action on the German right |
 |
| The Divisional cavalry, and the British AA Bofors (in the background) taking serious fire. |
 |
| The battalion's carrier platoon had tried to maintain some flank integrity for the British left wing, but is caught out by the panzer recce elements |
Meanwhile the German advance against the bridge proceeds. The infantry have pushed forward cautiously, expecting the bridge to be heavily defended, and they are right. The centre company (top centre in the photo)comes under mortar and artillery fire.
 |
| On the German left the PzkwIIIs exchange fire with the British A13 cruiser tanks |
 |
| as do the recce elements |
 |
| Action heats up in front of the bridge |
However the carefully staged assault sees a wave of fire fall on the bridge';s defending company, wiping out the defenders. Their hastily chosen defensive positions in the open have not served them at all well.
 |
| The smoke drifts away after the tirade of explosive and small arms fire dies away. |
 |
| The divisional cavalry is still holding out supported by the main British armour but finally succumbs |
 |
| The carrier platoon has pulled back in the face of overwhelming odds |
Colonel Gorman now commits his reserve company, taking with them his other 2pdr battery. These however come under fire.
 |
| German recce elements threaten the flank of the A13 position |
The German left advances against the bridge. The right wing company, supported by the heavy armour, pushes across the river. This section of the river proves to be fordable.
 |
| Infantry and armour testing the river |
In the meantime the German right wing battalion pushes its infantry forward
At this stage the batteries in the camera died, and I had to resort to my phone ... sigh!!
 |
| The A13s over the ridge |
 |
| The infantry across the river |
 |
| The battalions 75mm infantry guns deploy in support. ready for the assault across the bridge |
German fire is now concentrated on the company holding the small town anchoring the British left.
 |
| The overall deployment on the British left/German right at this stage in the battle. |
The German commander is now set for his assault on the British left, and pushes his infantry forward with AT gun support, threatening the flank of the position held by the British armour.
 |
| Action has now heated up, with intense fire from both sides. |
 |
| The main German armour is bested by the British cruisers and falls back after taking casualties. |
The weight of fire on the British left flank company is too much and casualties are so extensive that the company ceases to be able to function.
 |
| Casualties have also mounted for the British cruisers as the German recce elements take the A13s in the flank, the Cruisers withdraw. |
Colonel Gorman's battalion has been reduced to two effective companies in positions back from the bridge, and he recognises that his position is no longer tenable. He opts to withdraw.
Andy had a bad night on the dice, getting almost no support from his off table 25pdr batteries. However he recognised that his deployment had dispersed his forces too much, allowing the attackers to concentrate and defeat each component of his defence in detail.
As I said earlier, these wouldn't be my first choice for a WW2 game, but in our opinion Adrian's modifications are a significant improvement on how the Rapid Fire rules as written play out. And we had a lot of fun which is the point of the exercise.


