The opening phase of the battle saw the Turkish infantry send their 145th Regt across the pontoon bridge across the Jordan, taking up a position to protect the main assault from any interference from ANZAC forces in the south. Meanwhile Jon pushed the ICC regiment north to reinforce the two squadrons of the 11th ALH Regt positioned on Red Hill. Reinforcements were coming, but Jon knew he had to hold this position for some time until they arrived.
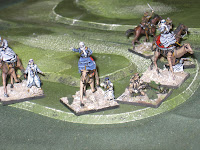
Here are a few photos of the 4th Battalion Imperial Camel Corp having moved to reinforce the two squadrons of Australian Light Horse on Red Hill. The figures are Airfix Arabs, used as 'proxies' for the ICC battalion.


Meanwhile Adrian and I had decided to make the main assault on the northern hill, to attack Red Hill would require us to take this feature, or bypass it, leaving considerable forces on our flank. The Division command zone wouldn't allow us to keep the forces on North Hill pinned while simultaneously attacking Red Hill.
Jon had taken up positions for all round defence of Northern Hills, as he was unsure exactly where the Turkish attacks would come from.
The main assault on the Northern Hills began with the other three Turkish Regiments moving up to positions from which they could bring fire down on the Australian forces. They were all at reduced strength after the variable strength rolls required at the start of the scenario, but two of the regiments were veteran (however in true Murphy's law it was the Regiments that had suffered the greatest strength reduction that were Veteran). The Turkish cavalry came on and moved around the eastern flank of the defending Australian forces on the Northern Hills. These cavalry were eventually driven off by ANZAC defenders, but not before they had inflicted casualties and pulled Australian reserves away from the main assault on the Western edge of the feature.
The fire fight evolved over 4 or 5 turns, with the Turkish machine guns supported by two regiments of Turkish 75mm guns, causing considerable casualties amongst the Australians. Once the ALH strength had been whittled down, one Turkish regiment rushed forward and was able to occupy Wadi El Sidr with only a few casualties, allowing the fire being brought down on the Australians to be increased even further. Finally the Turkish commanders judged that it was time to assault the position, and so they rushed forward onto the Northern Hills, taking minimal casualties, as the Australian strength had been so reduced. Finally the ALH were forced to take a morale test, which they failed. The Northern Hills belonged to the Turkish commanders, 5 victory points for the feature, and another 3 for having overrun the ALH guns.
However in the meantime the ALH and NZ Mounted Brigade reinforcements had arrived, moving rapidly north to occupy the wadi running around Red Hill. The position was too strong for the remaining Turkish forces, and the game ended after 10 moves with draw. The final photo shows the Australian and New Zealand troops, sleeves rollled up, getting down to action.


That's a nice wee report there Robin.
ReplyDeleteWell done.
Nick