Saturday, August 10, 2013

Armoured spearhead repelled-Prokhorovka 1943

Nick and I realised that this year was the 70th anniversary of the battle at Prokhorovka, around Kursk, on 12 July1943. So we decided that we'd try a 20mm Spearhead battle to mark the anniversary. Nick was itching to field as many vehicles as possible, and in his enthusiasm he misunderstood my suggestion that we both use Armoured Division lists, and took a 500 point list composed entirely of tanks.

Realising his error, I did suggest that he amend his list, but he decided to try it out anyway. So here we were, looking for a narrative that might explain the situation .. here goes.

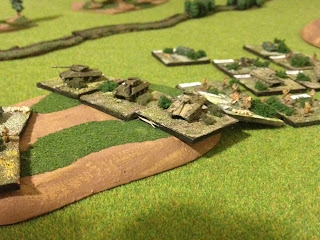
The plains around Prokhorovka appear to be empty - the view looking south.


A solitary German armoured battalion has pushed ahead of its supporting infantry, hoping to exploit the apparent emptiness of the landscape to take and hold the vital river crossings. Glory must have been the agenda for the day.

An under-strength Panther battalion takes up position commanding one of the vital river crossings.

As with so many other facets of this gargantuan battle around the Kursk salient, the Russian army knows what is happening, and pushes forces forward to counter the German armoured thrust. An infantry regiment pushes forward and takes the river line, while an armoured regiment with motorised infantry cross attached positions itself for a sweeping thrust around the southern flank of the German armoured commander.


One of the two cross attached regimental groups pushes ahead undisturbed, moving into position for the intended flank attack.

The regimental commander in BA32 follows closely behind the three platoons of T34s, the lighter BT7s have pushed ahead to provide a reconnaissance screen

The other cross attached armoured battalion takes up a reserve position

The German battalion commander's calls to Regiment have yielded the release of a second armoured battalion, with two of the precious platoons of Tiger 1 tanks in support. But where is the infantry that he desperately needs?
The newly arrived armoured battalion takes up a position on the commanding high ground in the centre.

The Russian left flanking armoured group arrives at its initial positions, with timed orders to move off after a brief stop.
The Russian commander at this stage committed his reserve, manouvring against the German armour in the centre.
The armour swings around to the west of a small village, while the infantry pushes out towards the high ground and the waiting German armour.

Screaming Katyusha rockets fall from the sky, but the German armour emerges unscathed.

With the benefit of smoke from battalion mortars, the infantry advances against the unsupported tanks.

The Russian reserve armour takes up hull down positions on the flank of the German armour but ..


The first round of fire from the Russian went almost unanswered as all but one of the Russian tank platoons was well behind their flank, but the flurry of shooting gave no result. Clearly the Russian tank gunners were over-excited. One platoon of T34s is suppressed.

The German armour manouvres to respond to the flank threat.

A Tiger platoon is suppressed.. but shakes off the suppression.


The southern flanking battalion receives a new order to move off immediately rather than wait in accordance with the initial battle plan, and begins to move behind the centre German armour. However at this stage the German commander also begins to redeploy the Panther battalion to meet the Russian armoured threat.


The advancing Russian infantry begin to attack the German armour in the centre and the first platoon of PzkwIVs is destroyed with infantry anti-tank weapons.

Another of the PzkwIV platoons is suppressed and then destroyed by the Russian armour hull down on the flank.

The southern flanking Russian armour can be seen at the top of the picture.

The German armour in the centre is flanked on two sides with the hordes of advancing Russian infantry. Russian 76mm artillery guns have been pounding the hill for some time creating nothing more than plenty of dust.

And more armour is destroyed by the infantry.

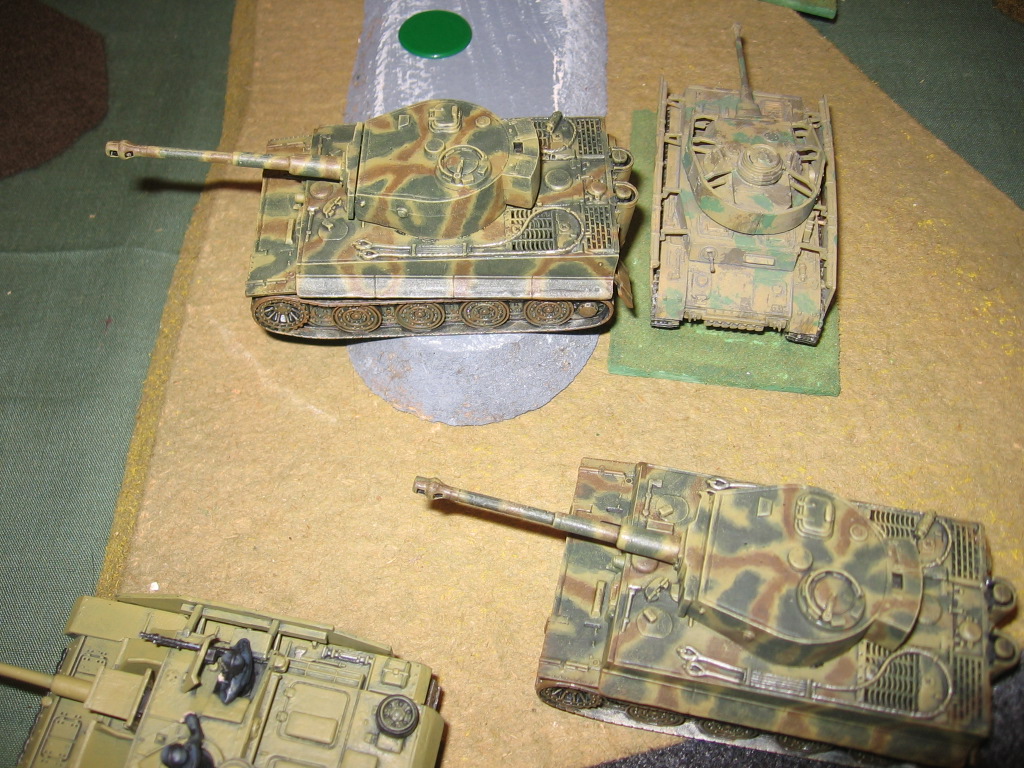
The two Tiger platoons have finally manouvred to meet the flank threat.

And the first T34 platoon is destroyed with the crash of the huge 88mm tank guns.

A second Katyusha strike hits the armour..

and a StuG platoon  from the AT company is destroyed by the Russian infantry.
The Russian infantry have proved unstoppable for the unsupported German armour. The Russian forces hold 4 of the 5 objectives, and the German armour in the centre has failed its morale check and must withdraw.

The German commander curses the inability of his superiors to provide him with the infantry support that he needed, withdraws from the area, and the bridges are lost.

It was quite a learning experience for Nick I think... unsupported armour is so vulnerable. Next time he'll take a more balanced force I suspect

Well played, Nick!!!


Saturday, August 3, 2013

"The Regiment will advance.."

The Regiment had been ordered to probe what Div HQ believed was an empty Norman landscape despite Intel's belief that veteran German panzer-grenadiers had occupied forward positions across the axis of advance. The Regiment was advancing, troops moving tentatively across fields and through farmsteads shrouded in early morning mist.
"One zero this is one zero alpha, over".. whispered voices.
"One zero over", more hushed tones.
"One zero alpha. We have movement in the tree line." The chatter of MG42 fire was clearly audible over the radio channel before the pressel switch was clicked off.
The point sections of the 2nd and 3rd Battalions were probing cautiously towards their objectives when fire broke out on 3 Battalion's front. Men dived for cover as 105mm rounds fell on their positions. The advancing Vickers platoons attached to 3 Battalion were early casualties. 2 Battalion continued it's advance through the village of Le Chat, it's first objective of the day, with the squadron of Churchill VIIs crawling reassuringly behind the forward troops.

1 Battalion had advanced to the heights on the left flank where it took up reserve positions.


The battle field seen from the British right, the British advancing from left to right.

Elite Panzer Grenadiers advanced onto 2 Battalion's objective unseen by the lead 2 Battalion platoons. The battalion deployed in depth with it's reserve company seen on the feature at the top of the photo.


The British Regiment had deployed for it's advance in three battalion groups. 1st Battalion at the top of the photo has already reached it's reserve position. Each battalion has a front line, and a reserve line, all very WW1 ish.

3 Battalion approaches it's objective, a small wooded hill, already occupied by those elite Panzer Grenadiers unknown to the British lead platoons.

2 Battalion's right flank company deploys in it's initial position, having reached its first 'phase line' in its attack, coming under fire from German infantry in the outskirts of the village sitting across it's front.

The main portion of 2 Battalion deploys around its objective of 'Le Chat', it's Churchill Squadron in support.

A second panzer Grenadier battalion  crosses a river line advancing on 2 Battalion's main position.

The lead elements of 3 Battalion on the British right come under fire from the previously undetected German elites, and simultaneously 105mm rounds crash amongst the British troops.

1 Battalion sitting in its reserve position on the high ground on the British left, watching with surprise as a German armoured force enters on the British flank, directly to its front.

The StuG IIIs and JgdPz IVs are supported by dismounted infantry.

The 3 Battalion commander order 9 Company to send two platoons right flanking in order to outflank the German position. However the German commander had anticipated just such a move and brought his battalion reserve forward to counter the move.

And suddenly the whole world fell apart as a Battalion Nebelwerfer strike hits 2 Battalion's forward position.
British counter battery assets (a battery of 5.5" guns) finally located the German 105mm battalion, and soon their fire had eliminated the entire battalion. However the damage had been done.

2 Battalion casualties from the German Nebelwerfer barrage were heavy.

And the forward elements of 2 Battalion were coming under pressure from the German battalion applying pressure to its front.


The flanking armoured force was caught by the AT gun screen of 6 pounders and 17 pdrs. One platoon of StuG IIIs was eliminated and another forced to close down and halt. The JgdPz IVs were forced to pull back by the 17pdr AT guns firing at long range.
British artillery had been in high demand across the entire division, and so the 25pdr regiment attached to the infantry regiment was late in lending its support to the regiment. However once engaged the entire regiment brought its fire down on the dismounted infantry, stripping two full companies from the German flank attack.

A second Nebelwerfer strike hits 2 Battalion and panic hits its ranks.

Meanwhile 1 Battalion was hit with heavy fire from the Battalion's flak units. Two platoons of Quad 20mm flak vehicles were taking a heavy toll, stripping the supporting AT gun batteries from the battalion in short order.

1 Battalion had started to take heavy casualties.
The Churchill squadron had been caught in the wrong position and was forced to manouvre to try and counter the armoured threat on its exposed left. I had assumed that 1 Battalion, deployed in reserve, would be able to contain any flank threat, but this was proving difficult. My position was in jeopardy because I had relied on 1 Battalion to protect the left flank, and had failed to deploy 2 Battalion to be able to respond to a flank threat itself.

In addition the 17pdr company attached to 2 Battalion was positioned in anticipation of a German armoured thrust through the centre. Two of the three batteries were able to provide support to the flank against the flank attack, but the third battery was forced to manouvre to try and get into a useful firing position.

2 Battalion was close to a morale check, with 3 battalion not far behind. The Britsh troops had received a severe bloody nose, a result of poor planning and inadequate support.

Overall a great game, but a few lessons for me on list composition and deployment.

The game was played using the 6mm Ros Heroics vehicles and figures from Keith's collect (German) and my own (British). The game was developed using Keith's scenario generation system, and became an advance to contact using defend lists.

My own defend list was proved to need some development, in particular because I had no adequate Option A prepared to add to my defending force.

Sunday, July 21, 2013

Toe to toe with the panzers ...

The 7th Armoured Division will advance ... ominous words in Normandy 1944. Four of us got together on Friday night for what for me was the first Spearhead game in 6mm for  a "loooong" time.

Andrew and I met Keith and Nick in a game set in NW Europe in 1944. The armies were organised using Keith's Scenario Generation system played using our collections of (mostly) Ros & Heroics models.

The meeting turned out to be an encounter battle, specifically an Advance to Contact. It might perhaps be thought of as a German spoiling attack against a British armoured thrust.
The British force was taken form an armoured division OOB. I chose to take the motorised infantry, with the recce regiment of Cromwells attached in support. There was plenty of artillery support (two regiments of 25pdrs, and two of 5.5" guns allocated from Corps for counter battery work. The RAF was also active with multiple flights of Typhoons allocated in support of the British, coordinated by two separate AGCs. This was a big push for the British.

The initial German deployment saw a battalion deployed on the German left, supported by two platoons of Tiger 1s


The recce regiment was also supported by three squadrons of M10 Achilles providing AT protection.


The Tigers were lurking menacingly, in this case in the outskirts of a small town.


The British right advanced and adopted a defensive position to secure that flank while the main thrust was launched on their left.

A battalion 6pdr unit prepares to deploy on the edge of a small copse.

The Achilles take up a position in over watch to protect the British right


The British left flank attach gets under way


Having felt that they had a measure of the British attack, the German command launched their armoured reserve, protected by three flak platoons - an Ostwind platoon, and two platoons of Quad 20mm flak.


One of the British AGCs called in a strike of Typhoons against the German right, determined to winkle out the Jaddpanzer IVs and Stugs. Meanwhile several concentrated stonks from an entire regiment of 25pdrs was beginning to have an effect on the waiting German infantry. The British counter battery artillery had also been active, locating and eliminating some of the German 1200 mortars.


The other British AGC spotted the arrival of the German armoured reserve and called in another flight of Typhoons (fairy battles in masquerading..) The first attack was driven off by the heavy flak umbrella.


At this stage the German command also ordered it's left flank battalion to attack the British right. The troops move.


The German armour reserve in the centre now lost contact with its AA umbrella as it crossed a river (the entire formation was seriously disrupted), and the Typhoons struck again, destroying a platoon of PakwIVs.


The German armoured reserve also now came under fire from the Achilles, and the battalion had now taken serious casualties. In addition the German battalion on the right was finally forced to withdraw having taken over 50% losses.

At this stage we called the game (it was late).

What a fantastic reintroduction....

Somewhere in Greece 1941

I have long been a fan of Jeff Plowman's military history writing, and have a number of his books on my shelves. Once again just recentl...