Wednesday, April 24, 2013

Viznetti - northern Italy, late 1944

It is late 1944 in northern Italy. The German army and the advancing Italian winter have finally halted the allied advance. The German high command has mustered significant forces for a counter-stroke, not knowing that there is one last gasp left in the allied offensive, as the allied command commits the New Zealand Division to one last attack to secure the town of Viznetti, and the crossings over the Moltovo River, swollen with late autumn rains and early snows.

Nick and I played this 20mm Spearhead game, created using Keith McNelly's Scenario Generation System.  The German army was taken from the 1944 Panzer Division OOB, while Nick used parts of the New Zealand Division. The lists weren't quite correct, but a part of our aim is to use the available 20mm 'toys'. Consequently, for example, the two German tank battalions were a little too small had we complied strictly with the system. The game was a 'Mutual encounter' using both sides' "encounter/attack" lists.


The battlefield looking east, with the German forces arriving from the north (left) of the photo, and the New Zealanders arriving from the south (right). Snow topped heights can be seen scattered through the mountainous terrain.
The Kiwis were going in with three of their infantry battalions supported by one of their armoured regiments.

The German force consisted of two under strength Panzer battalions, a Gepanzert battalion and a Fusilier battalion. High command had also attached two companies of valuable Tiger 1s to support the attack, battalions of 105, 150 and 170mm guns, and was desperately trying to raise some life from the Luftwaffe.

The German commander planned an armoured thrust to capture Viznetti (the 2 sector town in the upper photo). He cross attached the Fusilier battalion and the panther battalion, with the tank heavy battalion taking the west (right) German flank (nearest the camera) to take the snow covered peak and wait in reserve. The Gepanzert Battalion was cross attached with the PzkwIV battalion, with the tank heavy battalion to take Viznetti while the  infantry heavy battalion advanced slightly east to wait in a well covered valley in reserve.

The Infantry heavy battalion of Fusiliers was to make a flank attack, supported by the company of Tiger 1s, entering on turn 5.

The Kiwis focused their attack on their left, against the German right. The armour was cross attached with an infantry battalion, with the tank heavy battalion pushing out on their left. The infantry heavy battalion was sent on a flank march hoping to take the German positions in the flank and rear. These troops found the going difficult and arrived late in the day.


The German Panther battalion advanced and took up position on the objective expecting to be held in reserve.


In the centre the other two Kiwi battalions pushed up the central bridge.


They faced a force of PzkwIVs and armoured infantry occupying Viznetti and its surrounds. The centre battalion had the support of a battalion of 150mm guns, and their observer soon found a position in the local church spire from which to call down fire. First blood saw him locate and eliminate the supporting AT 6pdrs from one of the Kiwi battalions.


The Kiwi armour advanced against the German right flank, the supporting M10s eliminating one of the two Panther platoons.


The supporting Pak40 soon took a toll on the attacking M4s.


Turn 5 and the remaining Fusiliers arrive supported by the Tiger company.


The Kiwi commander pushes one battalion across the bridge, intent on assaulting Viznetti.
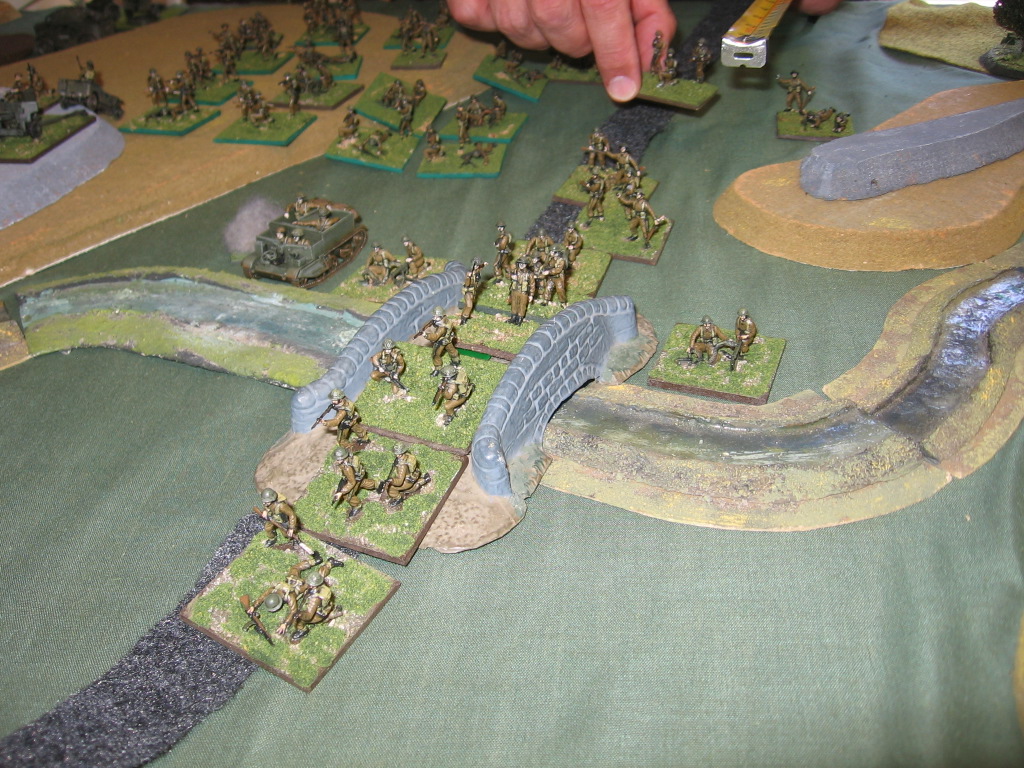

The Gepanzert troops wait to receive the assault around Viznetti, and quickly became the target of a British UNCLE artillery strike, surviving through sheer good luck. At this stage a vicious counter battery war began. The German commander had a battalion of 170s dedicated to CB, while the Kiwi commander had been allocated  a battalion of 5.5" guns in the same roll. The German CB locates one of the two Kiwi 25pdr battalions, eliminates a battery of 25pdrs, and suppresses another. The Kiwis for their part locate the German 150s, and manage to suppress one battery.


At this stage the Kiwi commander calls in a Typhoon strike, and the German troops take the brunt of their feared 'Jabo' attack. One PzkwIV platoon is destroyed.



Pressure builds on the German right, with their supporting Pak40s destroyed.


A fierce gun duel continues between the remaining German Panther platoon and the mass of Kiwi armour.


Meanwhile in the centre a Kiwi battalion pushes across the bridge.


Finally the Kiwi flank attack arrives, and the pressure becomes unbearable on the German right.


The German battalion commander breaks off, intent on pulling back to the next ridge line. This does mean abandoning his objective. At the same time the German commander commits his reserve to swing across from his left to support his endangered right flank. The counter battery war continues, with much of the Kiwi artillery suppressed or destroyed. However casualties are mounting on the German artillery, losing first one, and then a second battery of the 150s.


The German reserve streams across behind Viznetti to reach the right and re-establish a defensive line.


The German left flank force reaches its first objective, the second bridge across the river.


Pressure continues against Viznetti, with the Kiwi commander calling down smoke to screen his advancing infantry.


The Kiwi armour has taken significant casualties but continues to sweep around the old German right flank position, partially claiming the objective.

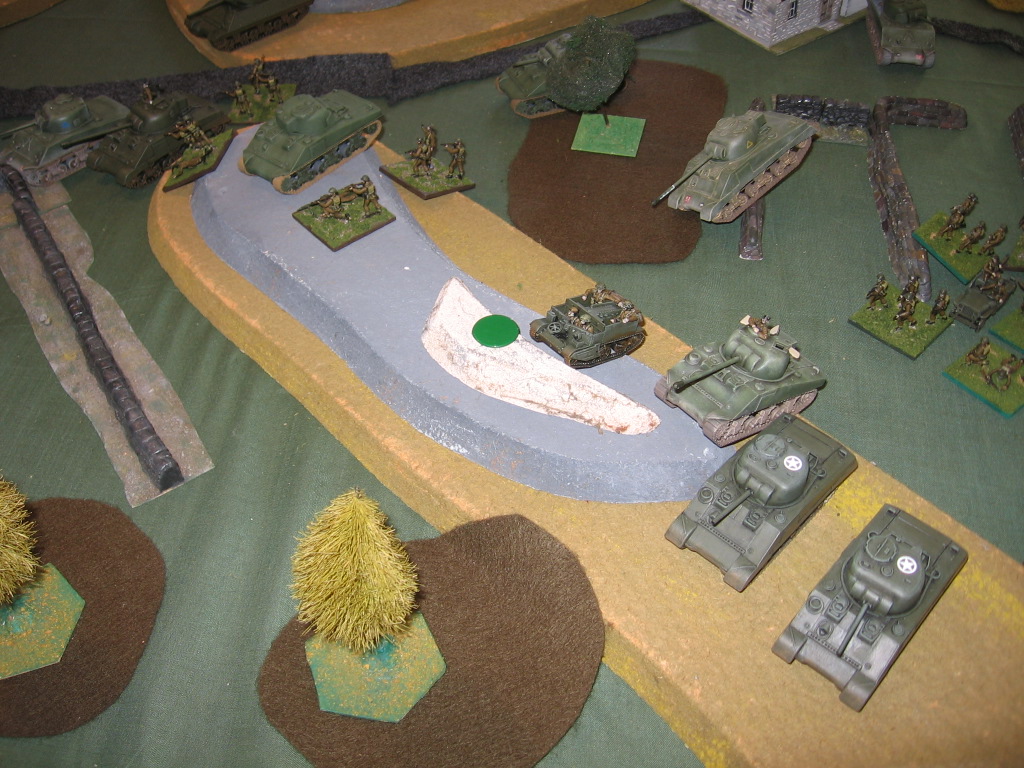
The Kiwi armoured attack arrives at the position previously occupied by the german right flank forces.

Kiwi infantry crossing to the front of Viznetti covered by the smoke screen.

A firefly and carrier on Nick's left flank (the German right). I included this photo just because I could, showing off Nick's great paint jobs.


The German reserve re-establishes the German right on the next ridge line.


The Kiwi armour floods across the objective previously held by the German on their right flank.

The German left flank attack positions itself on its objective, awaiting its next order to attack the Kiwi infantry in the flank.

The German armour has popped up onto a ridge line as it adopts its defensive position at the end of its attack arrow.


Finally some of the much promised Luftwaffe support arrives with a Stuka strike. The attack eliminates a Firefly platoon and an infantry platoon as the aircraft dive bomb their targets.


Casualties mount on the Kiwi armour. This M4 was destroyed by a German Sdkfz251/9 with its short 75mm gun - something of a lucky shot!!

The pressure builds in the centre around Viznetti.

It's tough for both attackers and defenders around Viznetti. The Germans have lost their vital 75 support and one platoon sits suppressed in the wood, while Kiwis are suppressed in the open.

The German forces that had broken off on the German right re-establish themselves on the next ridge line back.
At this stage the Kiwi commander realises that while he has made significant progress, he will be unable to take Viznetti without further support.

We called the game. The Germans held two objectives  The Kiwis held one objective, with another two contested, giving each side 4 victory points. An honourable draw and a fantastic game.

The game encompassed much of that is so cool about Spearhead. We had a real game of cat and mouse as we made our plans, each succeeding in applying pressure at the appropriate place. There was a vicious counter battery war, and both sides succeeded in gaining some air support. Nick's Typhoon attack managed to avoid the German AA (I'd taken one AA asset, probably too little for this time of the war), while he had no AA cover himself (not a bad risk to take at this stage of the war). We watched pressure build at critical times, each of us at differing times having to 'fight for our lives' to stay in the game.

This was Nick's first full blown SGS game with all of these dimensions included, and we both had a real ball. Great game, great opponent!!

Tuesday, April 23, 2013

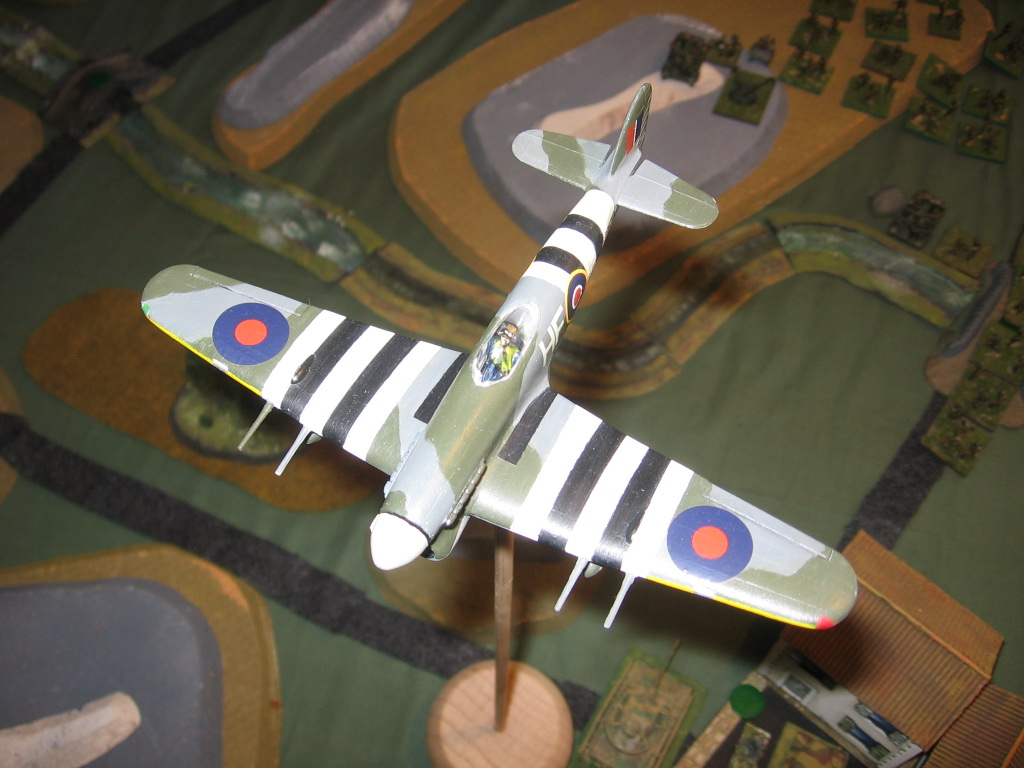
Nothing like a little Tempest ...

The Hawker Tempest rates as one of my all time favourite WW2 aircraft. No idea why, might be something to do with those war comics I read as a boy. So I was pretty happy when friend Nick gave me an old Revell Tempest V kit to provide some much needed air support for the late war 20mm WW2 British for Spearhead. The age of the kit meant that it came from that era when kits weren't perhaps as finely cast as we would expect today. Having said that, I am not overly happy with my assembly job anyway (regardless of the kit quality). The Normandy stripes were hand painted, and I felt as if I'd made something of a 'dogs breakfast' of them too.

Perhaps more importantly the transfers were so old that it was a struggle to get them off the backing and onto the aircraft intact. I persevered with the wing roundels, hand painted the tail markings and about gave up at that stage, so the model is currently missing the fuselage roundels. Oh well, on the table the visual effect will still be pretty awesome.

Thanks Nick....


And now just the Sturmovik to go in the quest for WW2 air support elements.

Saturday, April 20, 2013

'Buy me some time' ....


Somewhere north of the Crimean peninsula, and German forces are battling to keep the Russian counter-offensive at bay. Von Manstein has demanded more time to marshall German forces, and the 352nd Regiment has been sent forward to try to delay the Soviet forces. The Regiment has two operational battalions made up to 80% strength with recent reinforcements  but has lost much of its support weapons in the retreat. Army command has allocated two SP companies to help stiffen resistance, and Luftwaffe support if it can be spared. 'Buy me some time' were von Manstein's words.

Meanwhile a Russian tank brigade and motorised infantry battalion have been pushing hard on the heels of retreating forces in the area. An infantry regiment has been allocated to provide additional support as the advance runs out of steam.

The Russian mechanised forces advanced strongly on their right wing, their left pushed forward with the infantry regiment in order to take one of the bridges over the impeding river.

The Tank Brigade on the Soviet right

One Soviet infantry battalion advances on the bridge.

One of the two German infantry regiments pushes across to take control of the centre objective, some high ground that dominates the centre of the battlefield


The bridge is captured
 A preliminary bombardment by a battalion of Katyushas clears most forces of the central high ground, all except the artillery observer hidden away. Simultaneously two battalions of Soviet 152mm howitzers hits the high ground to the front of the tank brigade advance.


The tank brigade reaches its initial objective and pauses, under timed orders, waiting to push on. It is however engaged by the previously hidden StuG III battalion from a ridge in the distance.

The StuGs are well supported by an infantry battalion.


German and Soviet faces look to the sky as the familiar drone of Ju87 dive bombers is heard. The crews of the AA assets look sharp, scanning the skies.


Twice the flight of Ju87s hurtle down, and twice they are repelled by the Soviet AA cover.
In the meantime the engagement between the Soviet Tank Brigade and the StuGs hots up. One of the StuGs platoons and one of the T34 platoons are each suppressed, but the weight of firepower begins to tell, and the first of the two StuG platoons is destroyed.


The German artillery had come in to play and was starting to cause casualties amongst the Soviet infantry, but the Soviet force had two battalions of 152's allocated to it in a counter battery role, and quickly located the German guns. German artillery casualties start to mount.

The German commander believes that he has achieved his mission. The advancing Soviet forces have been forced to deploy for a full scale attack at the cost of a single platoon of StuGs and some casualties amongst the infantry. It's time to withdraw to the next river line.

I composed the forces for this scenario using the points system from Keith McNelly's scenario generation system, and Nick Grant and I played the game. I scaled down the size of the engagement to make sure that we were able to complete the game in the evening, but in doing so reduced the German force to two manoeuvre units. This was simply too small and so Nick had no reserves and had little with which to beat back the Soviet assault. Next time we'll play a game with the larger forces recommended in the system, allowing ourselves the time to fight the game to a conclusion.

Sunday, April 14, 2013

German air support: last steps in the 20mm Spearhead project

Just finished the first air support element for the 20mm WW2 Spearhead project: a Tamiya Ju87 G-2 Stuka. I think that this may be the first aircraft model I've assembled in over 30 years, and.. yes, I enjoyed it. Interesting how we can so easily forget the simple pleasures of our hobby.


Any Soviet commander's worst nightmare? Well close, anyway.

Swooping past a small Russian village


Another one of those 'This may not end well' moments.


I think my 'black/green' is too dark, perhaps because I used the wrong green base for the mix. But it'll do the job on the table top. Just the Sturmovik and the Tempest top go.

Saturday, April 13, 2013

The Boyne..


Managed to snatch my first game for quite a few weeks last Thursday when Adrian and I made our way down to the Cavaliers Club. I love these evenings, a pint of Old Dark, and some good 'gaming. This was our first time using Adrian's relatively new League of Augsberg armies, and we refought the Battle of the Boyne. The armies have been created using Essex 15mm LoA figures.

Here are just a few random shots snatched during the battle, not my best photographic work, but they provide a taste of the figures.


In the meantime, I've been pottering away at that 1/72 scale Ju87 given to me by Andy. It will provide the air support for the 20mm German Spearhead army. More soon...

Sunday, March 24, 2013

'Cos I could - a sea of stunts


Or a gaggle of Grots ...  I've always had a slightly perverse fascination with collective nouns...

So, because I could, and because I didn't the other evening, here is a photo of the Grots/Stunts completed.

There are 38 Grots, with two bosses (runt hearders in 40K terms). I just thought a sea of Grots might look cool.. of course you may not agree..

In Warpath terms that's two units of 20 (19 Stunts plus a boss). In 40K terms it might be a single unit, or a couple of smaller units.. in a saying credited to Joseph Stalin (apparently) "quantity has a quality of its own". Why doid I pain tthem? Simply because I had them, and I'm trying to tid up those outstanding packs of unpainted figures.. bought them 2nd hand at a convention 'bring & buy' a number of years ago. Sadly I've just added a pile more figures... 'the force is strong with this one'.


War of the Pacific 1879-1884

This week's other game was an 1880 foray into another South American War using Jon's 15mm South American armies, albeit that the pro...