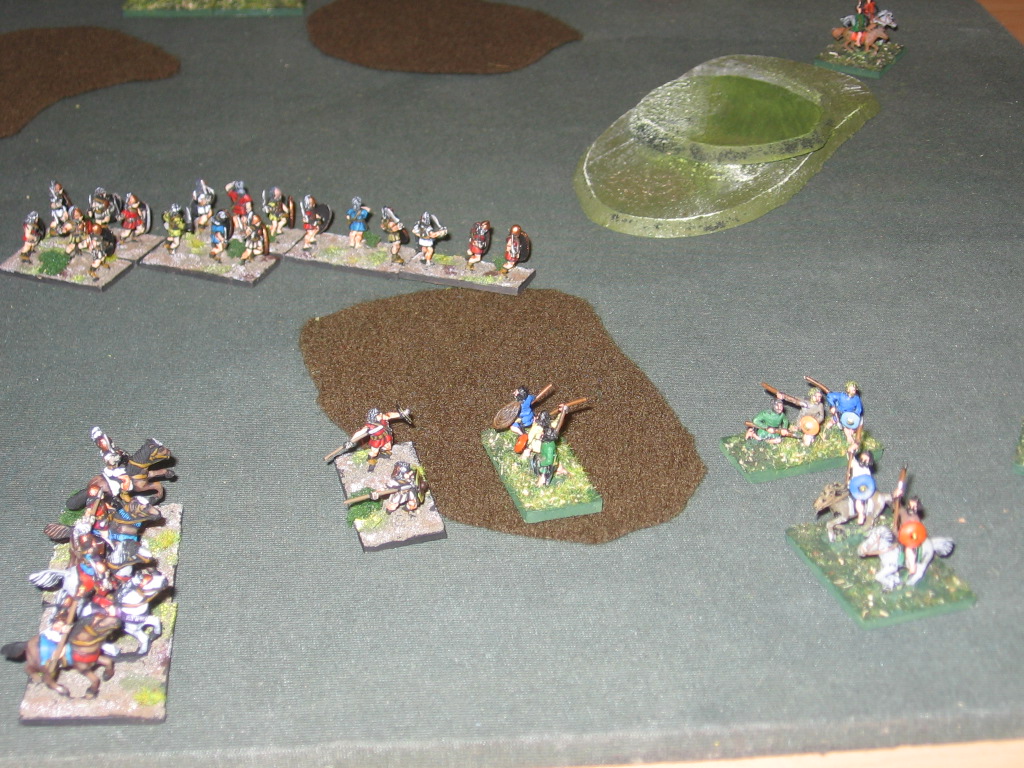
It was time. Time for the 25mm Napoleonic armies to come out and play again, and this time it was a small Peninsular battle: Alcaniz, 23 May 1809 between a Spanish army commanded by Blake, and a French army commanded by Suchet. As usual Adrian and I used our favourite rules set Volley and Bayonet by Frank Chadwick.
(Incidentally, why do we love these rules? Because we are able to refight historical battles at the appropriate level. It's not to our taste to be fighting battles at regimental and divisional level, putting out skirmishers, worrying about going into square etc. VnB allows us to command armies, and therefore focusses ut attention on thois things that would have been the concern of army commanders rather than Divisinal or Brigade commanders. It's a matter of personal taste, I guess.)
Anyway, Alcaniz is a smaller battle in VnB terms, and was a good excuse to drag out the 25mm napoleonic armies. The Spanish under Blake are trying to stop the French under Suchet crossing a river into a town. They have taken up defensive positions on two pieces of higher ground in front of the river and bridge, with a division deployed on their right holding the large area of high ground.
The French advance.
The French diviison in their centre advances towards the high ground held by the smaller of the Spanish divisions.
Meanwhile the Spanish division on the right withdraws back to the village on the high ground, but is quickly threatened by the French cavalry.
Spanish cavalry has managed to get arounbd the French left flank, and Spanish infantry have advanced from the Spanish left to threaten the French right flank. The French re-deploy some of their brigades to counter this. However the Spanish surprise the French by attacking the flank of the brigade seen here in the left centre of the picture. The French brigade was driven back in the attack. This was the first of several successful local Spanish counterattacks in the game.
The first French attacks, on the high ground in the centre, get underway.
The French lap around the right flank of the central Spanish defence, but are bounced back initially in the face of staunch defence.
The French cavalry first threatens the Spanish rear, but the French commander then withdraws them to his own rear to counter the threat of the extant Spanish cavalry.
By this stage in the battle the Spanish have been pushed off the central heights, and the Spanish line has been turned at right angles to its initial position.
The Spanish have had to reform their defensive line, with three battalions of artillery holding a large section of the line, surrounded by mostly M4 troops and miltia, and just a few regular army regiments.
The Spanish cavalry by this stage was exhausted (having engaged in several successful combats against French infantry, and the French cavalry), but stayed to try to protect the flank of the shrinking Spanish line.
The final French assault against the Spanish line broke through the Spanish line, leaving the entire Spanish army exhausted.
Sunday, February 6, 2011
'The Australian Light Horse'
'The Australian Light Horse', Roland Perry, ISBN 978-0-7336-2748-3
I've just finished reading this 512 page work. The book, published in 2009, is one of the best accounts I've read of the Palestine campaigns of the Light Horse, and makes an excellent companion to Terry Kinloch's 'Devils on Horses', his account of the NZ Mounted in the Middle East, or perhaps I should state that the other way around, as the NZ Mounted constituted one brigade in the ANZAC Mounted Division which was of course composed mostly of ALH.
Perry's account is in fact three stories: an account of the Australian Light Horse, Lawrence and the Arab revolt, and Chauvel as a military leader. Perry mantains that Chauvel might in fact be rated as one of the best 'cavalry' commanders of all time, and certainly commanded one of the largest cavalry forces ever seen, with the Desert Mounted Corps peaking at over 33000 men.
Amongst his fascinating conclusions is his extended comment of the impact of the Australians' extraordinary victory at Beersheba, which Perry claims laid the foundation for post war middle east developments by creating the base for the the remainder of the extraordinary victories in that theatre.
Perry also offers some fascinating insights into the tensions between Chauvel and Lawrence during the liberation of Damascus, and is not afraid to 'call a spade a spade' with his comments on Lawrence's duplicity with the Arab cause, and his sparing use of the truth in some sections of his famous 'Seven Pillars of Wisdom'.
Perry even affords several pages for the unfortunate affair at Sarafend in which a NZ sergeant was murdered by Arab thieves, resulting in some serious summary judgement by the New Zealanders supported by a number of members of the Australian Light Horse. He is not afraid to lay a part of the blame for this at the feet of Allenby for his dismissive treatment of Chauvel's requests for support in investigating the case.
This is an excellent and extremely readable account of the Australian Light Horse. I thoroughly recommend it.
I've just finished reading this 512 page work. The book, published in 2009, is one of the best accounts I've read of the Palestine campaigns of the Light Horse, and makes an excellent companion to Terry Kinloch's 'Devils on Horses', his account of the NZ Mounted in the Middle East, or perhaps I should state that the other way around, as the NZ Mounted constituted one brigade in the ANZAC Mounted Division which was of course composed mostly of ALH.
Perry's account is in fact three stories: an account of the Australian Light Horse, Lawrence and the Arab revolt, and Chauvel as a military leader. Perry mantains that Chauvel might in fact be rated as one of the best 'cavalry' commanders of all time, and certainly commanded one of the largest cavalry forces ever seen, with the Desert Mounted Corps peaking at over 33000 men.
Amongst his fascinating conclusions is his extended comment of the impact of the Australians' extraordinary victory at Beersheba, which Perry claims laid the foundation for post war middle east developments by creating the base for the the remainder of the extraordinary victories in that theatre.
Perry also offers some fascinating insights into the tensions between Chauvel and Lawrence during the liberation of Damascus, and is not afraid to 'call a spade a spade' with his comments on Lawrence's duplicity with the Arab cause, and his sparing use of the truth in some sections of his famous 'Seven Pillars of Wisdom'.
Perry even affords several pages for the unfortunate affair at Sarafend in which a NZ sergeant was murdered by Arab thieves, resulting in some serious summary judgement by the New Zealanders supported by a number of members of the Australian Light Horse. He is not afraid to lay a part of the blame for this at the feet of Allenby for his dismissive treatment of Chauvel's requests for support in investigating the case.
This is an excellent and extremely readable account of the Australian Light Horse. I thoroughly recommend it.
Wednesday, February 2, 2011
The trouble with DBA armies...
... is that they are addictive. Late last year I bought a15mm Early Minoan army from Essex. It's not painted yet, but Essex offered another of their "3 armies for the price of 2" deals, and so my son and I bought Vedic Indian, Early Archamaenid Persian, and Hittite armies. We quite like Book 1 armies. For me it's the chariots. I've always wanted a chariot army. Now I may have several, when I finally get them painted.
Incorrigible, addictive!!!
Thursday, January 27, 2011
The 198th still learning to fight!!!
Another Tau incursion, and again the Cadian 198th was called to make a heroic stand against the invaders. Again the game was 1200 points, and the scenario was an objective based 'pitched battle'. I think I may be learning how to play the game, managing to go 4 turns, and inflict far more casualties on the Tau. However I lost my manouvrability and my capability to take objectives, partly trying to be too smart with 'Outflank' moves. I'm still pondering whether a) I am simply still no good at this outflanking (although in other game systems I can use it to great effect), or b) the outflank option may simply not necessarily be the best option to use with Guard.
Anyway, a few photos from the game. The Guard left flank, secured in some ruins, and supported by the Leman Russ. There was a covering squad further to the left, occupyung some woods.
The Tau came on in their Devilfish, supported by a Hammerhead. The Guard had first move, and managed to immobise one of the Devilfish with fire from the Leman Russ. This effectively kept one Firewarrior squad out of the whole game, leaving them back close to the Tau baseline.
The Tau force included four suits (one was the commander.. a nasty wee brute I'd have to say).
The Tau manouvrability meant that they still came on in strength on the Guard left flank.
And the Kroot in the Tau centre and right were well supported by the suits. I managed to outflank with my Sentinels (a couple of Ork Kans doubling up as Sentinels). They had a shooting match with two suits, eventually dying in one outstanding Tau round of fire (one exploded taking two kroot warriors with it).
A Guard squad hunkered down in the ruins in their centre.
The Stormtrooper squad outflanked on the Guard left, and managed to take out most of a Firewarrior sqaud. However the Firewarriors passed their leadership test and hung in there!! The Stormtroopers became the focus of an awful lot of Tau fire, alhtough this did lessen the pressure on the Guard left flank for a couple of turns.
The Guard veterans rushed forward to attack the Tau left in the Chimera (a Rhino doubling as a chimera at this stage). The Chimera popped smoke and the vets disembarked.
This was coordinated with the Sentinel attack. However the distance was actually too great for them to support each other.
One Devilfish, having dismebarked its load of Firewarriors, rushed back to pick up the other squad which had carelessley lost its own Devilfish. This was a shot too tempting to resist for the Leman Russ - side armour and all. The shot went over however and hit the already immobilised skimmer in the rear of this photo. The Devilfish promptly exploded, but the still mobile Devilfish, loaded up with troops, survived.. a juicy opportunity lost!!
The vets, despite the cover provided by their chimera, fell to a pile of fire from the suits, as did the chimera.
Heavy fire on the Guard centre now told, and the squad here failng morale pulled back form their position.
The Tau held 3 objectives to the Guard 1, a clear victory for the Tau.
What did I learn?
Anyway, a few photos from the game. The Guard left flank, secured in some ruins, and supported by the Leman Russ. There was a covering squad further to the left, occupyung some woods.
The Tau came on in their Devilfish, supported by a Hammerhead. The Guard had first move, and managed to immobise one of the Devilfish with fire from the Leman Russ. This effectively kept one Firewarrior squad out of the whole game, leaving them back close to the Tau baseline.
The Tau force included four suits (one was the commander.. a nasty wee brute I'd have to say).
The Tau manouvrability meant that they still came on in strength on the Guard left flank.
And the Kroot in the Tau centre and right were well supported by the suits. I managed to outflank with my Sentinels (a couple of Ork Kans doubling up as Sentinels). They had a shooting match with two suits, eventually dying in one outstanding Tau round of fire (one exploded taking two kroot warriors with it).
A Guard squad hunkered down in the ruins in their centre.
The Stormtrooper squad outflanked on the Guard left, and managed to take out most of a Firewarrior sqaud. However the Firewarriors passed their leadership test and hung in there!! The Stormtroopers became the focus of an awful lot of Tau fire, alhtough this did lessen the pressure on the Guard left flank for a couple of turns.
The Guard veterans rushed forward to attack the Tau left in the Chimera (a Rhino doubling as a chimera at this stage). The Chimera popped smoke and the vets disembarked.
This was coordinated with the Sentinel attack. However the distance was actually too great for them to support each other.
One Devilfish, having dismebarked its load of Firewarriors, rushed back to pick up the other squad which had carelessley lost its own Devilfish. This was a shot too tempting to resist for the Leman Russ - side armour and all. The shot went over however and hit the already immobilised skimmer in the rear of this photo. The Devilfish promptly exploded, but the still mobile Devilfish, loaded up with troops, survived.. a juicy opportunity lost!!
The vets, despite the cover provided by their chimera, fell to a pile of fire from the suits, as did the chimera.
Heavy fire on the Guard centre now told, and the squad here failng morale pulled back form their position.
The Tau held 3 objectives to the Guard 1, a clear victory for the Tau.
What did I learn?
- Still not concentrating fire enough.
- Heavy weapons in the infantry squads isn't actually a good idea.. it tends to immobilise them. Better to take more HW squads, and keep them out of the infantry squads.
- I made a better job of coordinating the fire of the Leman Russ, and the Heavy weapons squad I did have (Heavy Bolters). They were very effective at area denial for the Tau.
- I'm still not making good use of the outflank options. The variability (as in random die roll to determine their point of entry) is more likely to diminish the impact/reduce concentration.
- I still didn't make effective use of the characters I took e.g. I forgot to use the Astropath to re-roll for entry for the Stormtroopers, resulting in tem comin gon on the opposite flank to the sentinels. Concentration would have been VERY useful here. The Priest was positioned wheer he didn't even get into atcion!!!
Saturday, January 22, 2011
Gee that went well...
Somewhere on a distant battlefield, hiding very carefully, is a Company Commander from the Cadian 198th, muttering "Gee that went well, didn't it". This is the guy who commanded a company of the 198th last night when the Sisters came to play.. play you say? Yeah right!!
The boys began well enough it seemed, hunkered down with a solid firebase and some armoured supports. A unit of Storm Troopers supported by a couple of scout sentinels was working their way around the Sisters' flank. Seemed like a great plan ...
Except for a group of three Penitent Engines .. ok, they can be shot away easily, and they are confronted by some of the might of the Emperor's armour!!
But the 'Holy Rage' was strong in these girls .. whew, get outta the way!!
On the other flank a brave squad of Sisters, supported by their Seraphim, thought they'd like to get more intimately acquainted with some of the 198th's boys.
The Penitent Engines were incredibly keen to have a crack at a squad of veterans hunkered down in cover, supported by the armour, and with a holy priest present to help them maintain their focus (his eviscerator was rearing to go too). The veterans had the task of protecting the left flank. The Penitent Engines threw 5s and 6s for their extra moves.. they were very keen!!
There was the usual heavy support for the Sisters too.
However I positioned the Priest badly, and the boys just couldn't do the business. Result: one unit down and a very exposed left flank. The company commander had a worried look on his brow.
On the other flank the infantry squad took a turn of heavy bolter fire. The commander had sent a medic to support the squad, but he succeeded in failing EVERY one of his 'Feel no pain' throws, and almost the entire squad was wiped out. Now there were beads of sweat running down the Company Commander's brow.
Then the Stormtroopers arrived.. at last.. the Seraphim were hit by a veritable storm of fire from the Storm Troopers, the Sentinels, and a supporting squad from their front. Only problem - the Seraphim made all of their armour saves despite a large numer of wounds. NOW things were looking dodgy!!
Meanwhile on the other flank the Penitent Engines were rampaging on .. they took on the combined squad that was protecting the other flank and wiped it out (you wouldn;'t believe the throws Adrian made in combat.. oh yes you would), while the Exorcist finally managed to get a decent shot at the Leman Russ and destroyed it.
'Every man for himself' may well have been the company commander's last cry as he fled the field... sigh!!!
The final tally was something like 7 kill points to the Sisters, and 0 to the 198th. How many mistakes did I make? Whoa... I haven't got that many fingers and toes... maybe one day I'll learn how to play this game.
The boys began well enough it seemed, hunkered down with a solid firebase and some armoured supports. A unit of Storm Troopers supported by a couple of scout sentinels was working their way around the Sisters' flank. Seemed like a great plan ...
Except for a group of three Penitent Engines .. ok, they can be shot away easily, and they are confronted by some of the might of the Emperor's armour!!
But the 'Holy Rage' was strong in these girls .. whew, get outta the way!!
On the other flank a brave squad of Sisters, supported by their Seraphim, thought they'd like to get more intimately acquainted with some of the 198th's boys.
The Penitent Engines were incredibly keen to have a crack at a squad of veterans hunkered down in cover, supported by the armour, and with a holy priest present to help them maintain their focus (his eviscerator was rearing to go too). The veterans had the task of protecting the left flank. The Penitent Engines threw 5s and 6s for their extra moves.. they were very keen!!
There was the usual heavy support for the Sisters too.
However I positioned the Priest badly, and the boys just couldn't do the business. Result: one unit down and a very exposed left flank. The company commander had a worried look on his brow.
On the other flank the infantry squad took a turn of heavy bolter fire. The commander had sent a medic to support the squad, but he succeeded in failing EVERY one of his 'Feel no pain' throws, and almost the entire squad was wiped out. Now there were beads of sweat running down the Company Commander's brow.
Then the Stormtroopers arrived.. at last.. the Seraphim were hit by a veritable storm of fire from the Storm Troopers, the Sentinels, and a supporting squad from their front. Only problem - the Seraphim made all of their armour saves despite a large numer of wounds. NOW things were looking dodgy!!
Meanwhile on the other flank the Penitent Engines were rampaging on .. they took on the combined squad that was protecting the other flank and wiped it out (you wouldn;'t believe the throws Adrian made in combat.. oh yes you would), while the Exorcist finally managed to get a decent shot at the Leman Russ and destroyed it.
'Every man for himself' may well have been the company commander's last cry as he fled the field... sigh!!!
The final tally was something like 7 kill points to the Sisters, and 0 to the 198th. How many mistakes did I make? Whoa... I haven't got that many fingers and toes... maybe one day I'll learn how to play this game.
Sunday, January 16, 2011
Those DBX games..
Last Friday started out with the best of intentions: play our first Great War Spearhead game in a few months. Ah, but we were clearly on that 'road to hell'.... The day morphed into a couple of DBA games (one using 15mm armies and the other using 25mm armies), and then a couple of HotT games (with lunch and a couple of beers interspersed.. the joys of the holiday season, but sadly drawing to a close all too quickly).
In the DBA games Nick used Light Horse armies in both (Early Ottoman in the first, and Hun in the second) and managed a win in both, much to his relief as he'd had quiet a drought on DBA victories recently. I have to say he pretty much tore me apart in both games, and we are wondering whether light highly manouvrable armies are more suited to his playing style? He has tended to use slower more solid armies in the past.
A couple of shots of the Romans taking on the Huns.
And a couple of shots of the HotT games. Lorraine played her first games with her new HotT armies, Angels, and Evil Women. Lost the first, but won the second... nice going!!!
In the DBA games Nick used Light Horse armies in both (Early Ottoman in the first, and Hun in the second) and managed a win in both, much to his relief as he'd had quiet a drought on DBA victories recently. I have to say he pretty much tore me apart in both games, and we are wondering whether light highly manouvrable armies are more suited to his playing style? He has tended to use slower more solid armies in the past.
A couple of shots of the Romans taking on the Huns.
And a couple of shots of the HotT games. Lorraine played her first games with her new HotT armies, Angels, and Evil Women. Lost the first, but won the second... nice going!!!
Tuesday, January 11, 2011
Woolston DBA tournament
Last weekend I played in the second annual Woolston DBA Challenge (for official results follow this link) organised by Keith McNelly. There were 9 of us playing across 6 rounds, with local players taking a bye to allow those who had travelled from Timaru (south of Christchurch) to get a full complement of 6 games in.. fair and just reward for travelling to join us!!).
I took my Spanish (Celtiberians, with 6 x warband) - the only 15mm army I have that fitted the period of the tournament. I had had little success with these guys before and felt that they were probably the easy beats of the day.. how wrong I was!! I defended in all 5 games, and made sure that I used the max 2 steep hills, and 3 other pieces of rough ground. I wanted to disrupt my opponent's deployment, and give myself the best opportunity to occupy rough ground as I wasn't convinced that the army would stand up particularly well to the pike and spear armies that I thought would be predominant on the day.
The first game was against Brian's Bosphorans. Brian had to work hard to advance around the terrain and get at me (all photos are taken from the Spanish side of the table).
He advanced his knights down his left (my right).
I attempted to delay with my light horse, but these guys didn't last long.
My general supported by a warband ended up defending my flank (and my camp) against the knights.
Brian pushed me back to the camp, and a couple of lucky die rolls on the day saved my general, and saw one of his knights destroyed before we had to call time on the game (the format allowed one hour per game). Lucky for me, as given another couple of turns Brian would have taken the victory.
The next game was against Stephen's Numidians. Stephen swooped on my right flank with his light horse while pinning me with his auxilia in the centre.
Things were looking dodgy on my right as Stephen cunningly worked around my flank with the light horse supported by a couple of auxilia units.
Seeing that the writing would be on the wall if I sat back and continued to cede the initiative to him, I advanced my warband against his auxilia in the centre, and a series of lucky die rolls on my part saw me take out his centre and the game. Frankly this was a case of good luck for me and bad for Stephen as he had totally outmanouvred me as far as I was concerned. We were both a little 'gobsmacked' at the result!!
The third game was against Joel's new Lysimachid army. This was tough. Joel organised himself well, and was methodical and careful in how he advanced, trying to make sure that each attack was well organised to maximise the chance of success.
Most of the action took place on the Spanish left where I clung to the steep hill like glue, and effectively fought Joel to a standstill.
The game ended in a well fought draw.
After my bye round I faced Simon and his Polybians. Again this was a well organised attack against a Spanish defence based on the terrain.
Simon organised himself well and attacked on the Spanish left (his right).
He went in with Spear, and cavalry. That's his general on the right of the picture attacking Spanish warband.
Yet again luck favoured the Spanish, with Simon losing both a spear base and his general in the one turn, giving the Spanish their second victory of the day. Once more we were both surprised .. the outcome wasn't one that had looked likely as Simon organised his attacks.
Last game of the day was against Jim and his Ptolemaics. Jim was top of the table and unknown to me I was actually vying for one of the top spots at that stage .. yeah right!! Jim is another player who took his time and organised his attack carefully.
Jim opted to hold in front of my warband on the steep hill, and attack my left flank.
The action around the flank was hard fought, with the initiative in this battle swinging both ways.
Finally Jim took the game with a series of combat victories on the Spanish left, leaving him the only commander to defeat the Spanish on the day... a well deserved victory on his part, and a fitting end to a fantastic game, and a fantastic day.
Thanks to the other 8 players for a wonderful day of good hunoured and well fought battles, and to Keith for organising the day.
I took my Spanish (Celtiberians, with 6 x warband) - the only 15mm army I have that fitted the period of the tournament. I had had little success with these guys before and felt that they were probably the easy beats of the day.. how wrong I was!! I defended in all 5 games, and made sure that I used the max 2 steep hills, and 3 other pieces of rough ground. I wanted to disrupt my opponent's deployment, and give myself the best opportunity to occupy rough ground as I wasn't convinced that the army would stand up particularly well to the pike and spear armies that I thought would be predominant on the day.
The first game was against Brian's Bosphorans. Brian had to work hard to advance around the terrain and get at me (all photos are taken from the Spanish side of the table).
He advanced his knights down his left (my right).
I attempted to delay with my light horse, but these guys didn't last long.
My general supported by a warband ended up defending my flank (and my camp) against the knights.
Brian pushed me back to the camp, and a couple of lucky die rolls on the day saved my general, and saw one of his knights destroyed before we had to call time on the game (the format allowed one hour per game). Lucky for me, as given another couple of turns Brian would have taken the victory.
The next game was against Stephen's Numidians. Stephen swooped on my right flank with his light horse while pinning me with his auxilia in the centre.
Things were looking dodgy on my right as Stephen cunningly worked around my flank with the light horse supported by a couple of auxilia units.
Seeing that the writing would be on the wall if I sat back and continued to cede the initiative to him, I advanced my warband against his auxilia in the centre, and a series of lucky die rolls on my part saw me take out his centre and the game. Frankly this was a case of good luck for me and bad for Stephen as he had totally outmanouvred me as far as I was concerned. We were both a little 'gobsmacked' at the result!!
The third game was against Joel's new Lysimachid army. This was tough. Joel organised himself well, and was methodical and careful in how he advanced, trying to make sure that each attack was well organised to maximise the chance of success.
Most of the action took place on the Spanish left where I clung to the steep hill like glue, and effectively fought Joel to a standstill.
The game ended in a well fought draw.
After my bye round I faced Simon and his Polybians. Again this was a well organised attack against a Spanish defence based on the terrain.
Simon organised himself well and attacked on the Spanish left (his right).
He went in with Spear, and cavalry. That's his general on the right of the picture attacking Spanish warband.
Yet again luck favoured the Spanish, with Simon losing both a spear base and his general in the one turn, giving the Spanish their second victory of the day. Once more we were both surprised .. the outcome wasn't one that had looked likely as Simon organised his attacks.
Last game of the day was against Jim and his Ptolemaics. Jim was top of the table and unknown to me I was actually vying for one of the top spots at that stage .. yeah right!! Jim is another player who took his time and organised his attack carefully.
Jim opted to hold in front of my warband on the steep hill, and attack my left flank.
The action around the flank was hard fought, with the initiative in this battle swinging both ways.
Finally Jim took the game with a series of combat victories on the Spanish left, leaving him the only commander to defeat the Spanish on the day... a well deserved victory on his part, and a fitting end to a fantastic game, and a fantastic day.
Thanks to the other 8 players for a wonderful day of good hunoured and well fought battles, and to Keith for organising the day.
Subscribe to:
Posts (Atom)
Attack into Belgium 1914
Much like elephants mating, wargames projects can be long in gestation. Murray began his 1914 Belgian division for Great War Spearhead quite...
-
I can still recall seeing the photos and reviews of those Greenwood and Ball Napoleonics, and early Peter Laing 15mm figures for the Marlbur...
-
What is the measure of a good set of wargames rules? Ask 100 'gamers and you'll likely get 100 different answers, although I suspect...
-
The Battle for Lesnica in Serbia on 12 August 1914 was a small part of the larger action known as the Battle of Cer . This Great War Spearhe...