Friday, October 7, 2022

Martian invasion halted

 The first canisters had arrived two weeks ago. Wells had recorded their arrival, and those first battles on Horsell Common. The small scattering of British army forces had delayed the Martian invaders long enough for Carruthers to gather together a force strong enough to stand against the invaders. Small groups of men had stood, knowing that theirs was a suicide mission, their task to do and die, their task to delay the invaders, to give their lives in the service of their Queen and their nation. Today was that day when mankind would stand. Today the future of mankind would be decided.

This was a 48 point HotT game pitching Andy's expanding Martian army against  my British VSF army.

The armies face off, Martians on the left, British on the right

Martian shooters, flyers, human mercenary shooters, and tripod behemoth (from the Ares 'Tripods and Triplanes' game)


Lancers (knights), and members of the local Yeomanry cavalry (riders)
 

Lord Chelting of Cheam, the local aerial hero, supported by an airboat

Lieutenant Winstanly, the dashing young hero chappie, supported by a steam robot (behemoth) with Dr Morgenstein that amazing wizardly scientific chappie (magician).

Shooters take up position in the built up area (a scientific establishment)

Chelting and supporting airboat overfly the battle lines and attack the Martian flyers in the rear of the Martian line

Morgenstein ensorcels the enemy hero general, and the artillery eliminate a stand of Martian shooters, leaving the centre looking bare

In frantic aerial combat Chelting sends one Martian saucer spinning to the ground

The British mounted regiment struggles, one unit of Yeomanry eliminated as they battle to hold the left flank

The Martian hero general desorcels and reappears in contact with the destroyed village that is the British stronghold

Meanwhile the second of the Martian saucers is eliminated

The cavalry are still struggling, but hold the flank

The Martian hero is repulsed from the stronghold

The cavalry delaying action

Chelting turns his aerial force around and attacks Martian shooters, but the airboat is repelled

Caruthers advances against the Martian centre

The Martian centre under pressure

Martian shooters continue to drive the airboat back

The Lancers are eliminated.. that last rider unit looks lonely

Chelting charges into the rear of the Martian centre


The Martian centre crumbling under the combined pressure

The Martian hero turns and attacks Dr Morgenstein

Morgenstein is down... 

Caruthers marshalls his forces, including Winstanley, to tackle the Martian hero. At this stage the Martian left flank is demoralised

The Martian right beginning to advance on the British. In Andy's defence his right flank had been starved of PIPs for most of the game so far, consistently throwing 1s and 2s

Caruthers leading from the front, attacks the Martian hero general, with his steam robot behemoth, and WInstanley (hero), in support

Chelting keeps up the pressure

The last unit of Yeomanry falling back before the Martian advance

The Martian Hero General is eliminated


At this stage the Martian army has lost over 50% of its overall strength. Whew, what a battle, and a great evening of 'gaming. In fairness to Andy, he was starved of PIPs for much of the game, especially on his right flank, throwing far more than his fair share of 1s and 2s. The ability to win the aerial combat and to then be able to unleash the aerial hero on the rear of the Martian army was crucial. I'm not convinced players should rely on such a strategy though. In the past my attempts to do this have failed when I have been the player starved of movement PIPs.

The Martian invasion had been halted!!!

Saturday, September 17, 2022

Messing around with pre game bombardments in Great War Spearhead

While the 1917/1918 WW1 western front painting project isn't finished yet (work and life tend to fill most waking hours at the moment), Jon and I have been thinking about some simplification of the GWSH trench game bombardment mechanisms. I hope that doesn't sound too treasonous, Shawn, Robert.

Anyway we started a small game last night to see how things might play out. The troop densities are not ideal. We weren't there to play a game'; as much as to see how some possible changes to the bombardment rules might impact game play.

These photos capture the progress we made (and I quite like the 'aesthetic). The 'game' (I'm hesitant to call it that) featured a division attacking two regiments. We only tried to model the pre game bombardment phase, and an initial 'stepping off' of the attack. We will spend some more time on this little game simulation to see how it might play.  The in game artillery hasn't featured, either called in fire, or SOS, or counter battery. We'll add these things in as we evolve our thinking. We are trying to stay true to what we think is the underlying design philosophy, while creating our own simple underlying game play.

Who knows. Our ideas might make it into the official GWSH III, although that of course is not our call. Whatever happens, it's great to be inspired by a rules set.


Saturday, July 23, 2022

Reviewing the 1915-18 game terrain aesthetic

 I've been working away at new/improved terrain, particularly for World War 1 and Great War Spearhead. I've invested in Timecast trench and road sections, and have been scratch building sections of 'wire', using pot scourers to create the 'dense wire' look on the table top. 

Having just finished some roads, and the first 'production batch' of the wire entanglements, I couldn't help setting out some terrain and a few figures to see how the look is progressing.


Pretty happy with this, except that the consistency of the bases and terrain pieces is so good that I struggled to actually 'see' the fighting stands on the trench terrain .. ooo darn.


Capturing the turnpike

 Keith and I managed an ACW game this week. It was a fictional game set in 1862, at 2600 points (using the Volley and Bayonet Road To Glory scenario system points), using my 15mm armies (mostly old Freicorps figures).

Each side consisted of two Corps. To mix things up each side had one Corp entering the table on turn 1, and the second entering on a random turn, along one of the two entry roads along each side's base line, the road selected randomly.

The second Confederate Corps cam on in turn 2, but on the same road as the initial advance, creating quite a traffic jam as they entered onto terrain broken up with woods.

The Union second corps entered on turn 4, also along the same road as the initial advance, with with clearer terrain into which to deploy.

Both forces were attempting to capture the central turnpike and at least one of the two fords that crossed the river bisecting the battlefield. This was clearly an important transport hub.


The terrain before deployment, the Union advance from the left, the Confederate from the right. Both forces entered on the roads nearest the camera.

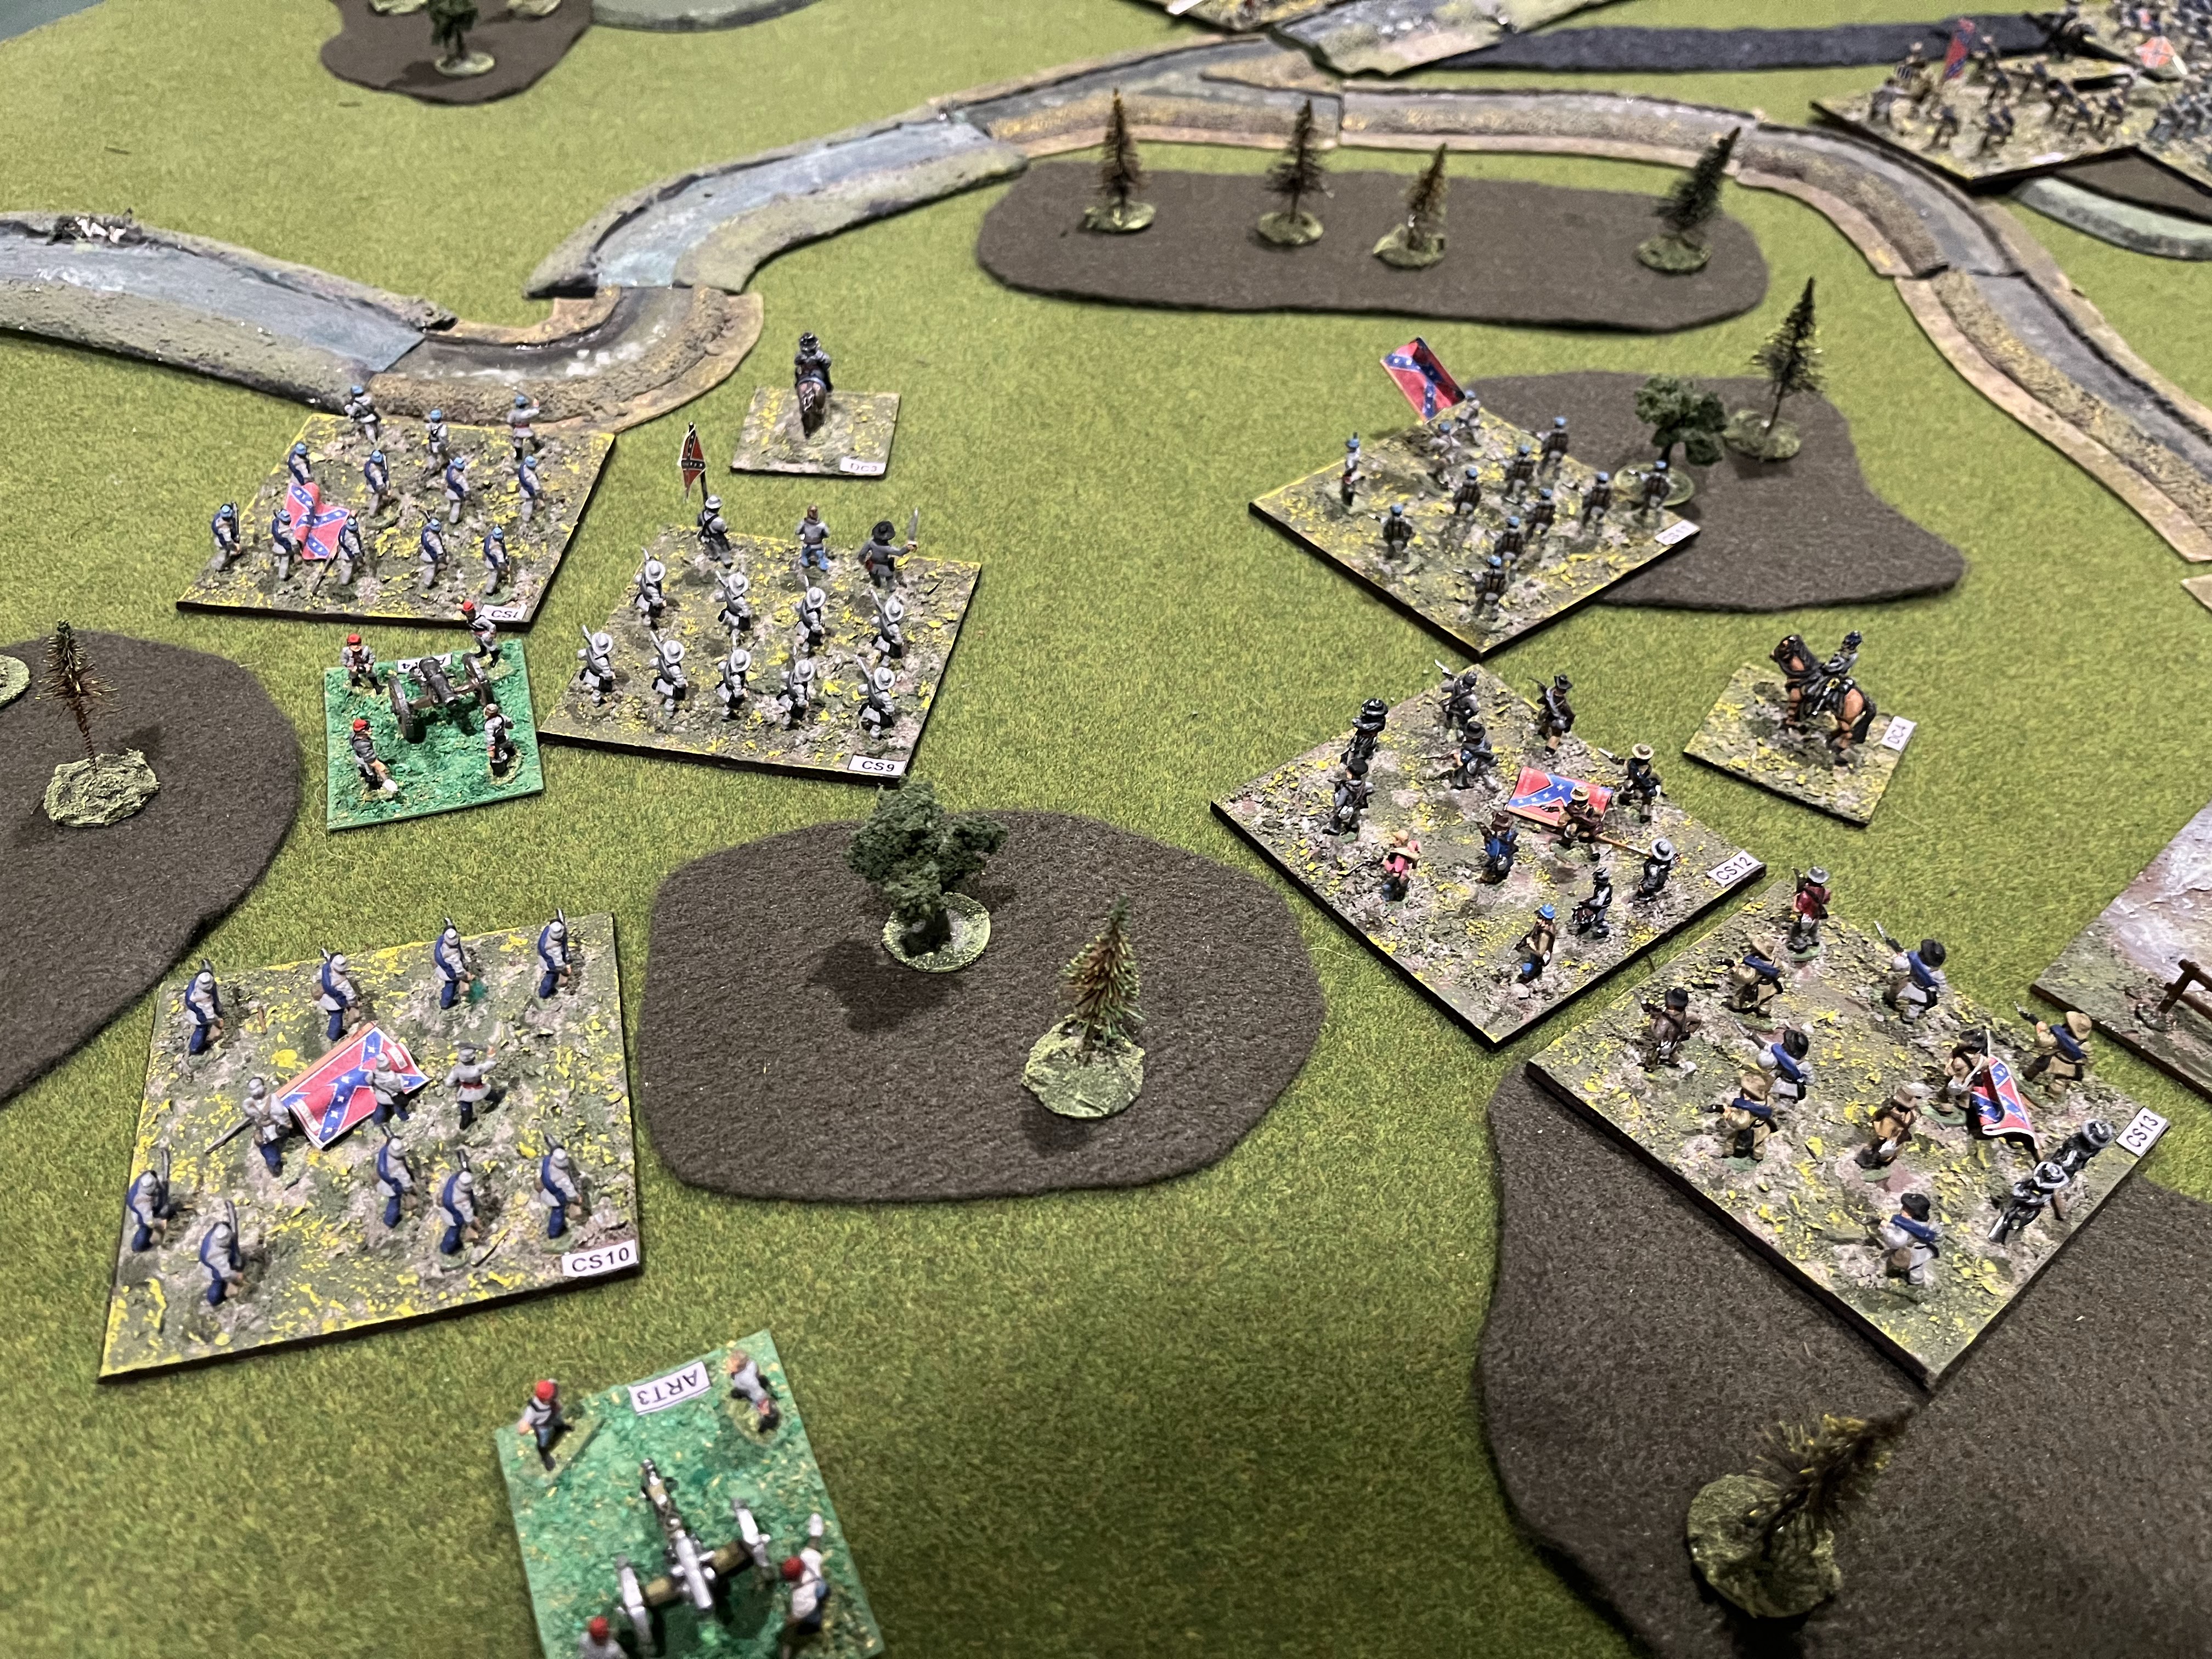
The first Confederate advance. The congested nature of the terrain facing the Confederate forces is apparent.

The main turnpike, the Union forces grabbing the town first


Union forces take up defensive positions along the banks of the stream


The second Confederate corp enters in two columns


The confederate deployment opposite the turnpike pouring fire into the town (a wooden town, testing for 'fire' each turn)


One division of the Confederate second corps pushes out to the right towards the second ford

Must be Jackson.. the bulk of second corps advances around the Union right flank, but a long way from the action

The dismounted Union cavalry regiment pushes across the ford, threatening the Confederate right

The volume if fire on the Union brigade occupying the turnpike leads Keith to withdraw the brigade

Keith also refuses his right in anticipation of the advancing Confederate left


It's looking pretty congested in the centre as a firefight develops


The Texans (M6 Shock) occupy the town at the turnpike

The Union cavalry is pushed away from the action

The confederate left approaches the stream

Confederate brigades push across the stream at the second ford.

The Union attacks the town, but is repulsed

The Texans attack the town and forcing the new defending Union Brigade to rout, but they become disordered entering the town sector .. and then .. in the next Union turn Union forces pour fire into the sector and the fire into the wooden town causes it to catch fire, and fire into the town it catch and ..

The Texans, already disordered from their move into the town, retreat as a result of the fires, adding a disorder.., it becomes a rout in game terms as the troops flee the burning town!!

The routed Texans

The Confederates on the right attack the Union brigades attempting to hold them back form the ford

They drive them off ..

However at this stage the centre division was in morale collapse and the second division in the centre was nearly exhausted. The game appeared to turn the Confederate way until the very last turn, when the smaller Confederate brigades fell apart. They had fought hard and taken significant, and ultimately unsustainable, casualties.

The terrain had held up the bulk of the Confederate second corps, meaning that six Confederate brigades, and two Corp artillery batteries, never saw action. This made a difference!!

The forces were 2600 points, and at full scale provided plenty of action on a 6'x4' table. I'm not used to creating Volley and Bayonet scenarios, but this one worked out well. The terrain presented challenges for both players, and provided a great wee engagement.

Turkish raid on the Suez January 1915

For quite some time now I have been fascinated by the the Turkish attempt  to cut the Suez Canal in January/February 1915. The attempt ende...